
dsigns guides · Create content
Manage your media
Keep images and videos ready to use.
Upload images and videos
Open Media → Add content → Upload files, select the customer when shown, and choose one or several files. Keep the page open while the queue uploads each file in turn. The dashboard shows the active upload limit; the default is 500 MiB per file. Canva exports have separate limits.
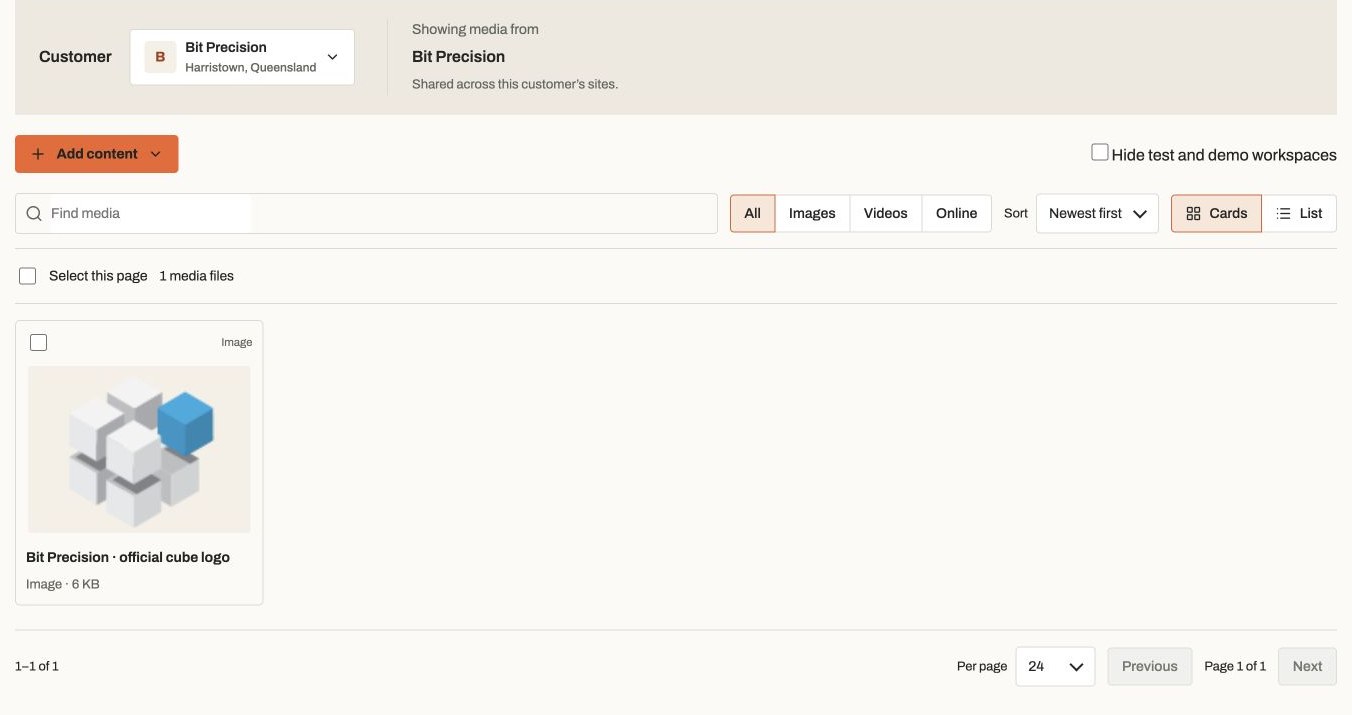
Actual app controlsThe Bit Precision example has one image. Choose Add content to upload files. Wait for the checks
Watch the uploading and validating progress. “File headers checked” means the upload passed the server’s checks. It does not guarantee every device can decode the file. Use Retry file for an interrupted file still in the queue. After reopening the page, select Resume with original file and choose that file. Completed uploads stay in the library.
Preview and organise
Use clear names so files are easy to find later. Library cards use small cached previews. Open Preview to inspect the original; browser support differs from native player support. Upload guidance checks dimensions and size. Optional JPEG optimisation creates a smaller upload copy when it saves space; PNGs, animations and videos stay unchanged. For a first test, use a JPEG or PNG and a 1080p H.264 MP4; see platform format guidance.
Put the file to work
Add it to a playlist, a layout Content widget or a screen/card background. Save and publish the affected players. Uploading alone does not change playback. Open Edit → View usage before deleting; remove its references first.