dsigns guides · Start
Get your first screen playing
Connect a player, add your content and publish.
Install and open the player
Choose the right download in Downloads & setup. Install dsigns on the device connected to your TV, connect it to the internet and open the app. You should see a five-letter code.
Connect it to your account
In the dashboard, open Players → Add player. Enter the five letters, choose the customer and group when shown, and select Connect player. Give it a name you will recognise, such as “Front window”. To change it later, open the player and select Rename player beside its name, or use the player’s ⋮ → Rename player menu in the list. If you have no group yet, open Organisation → Groups, or choose the customer in Customers when using the master workspace.
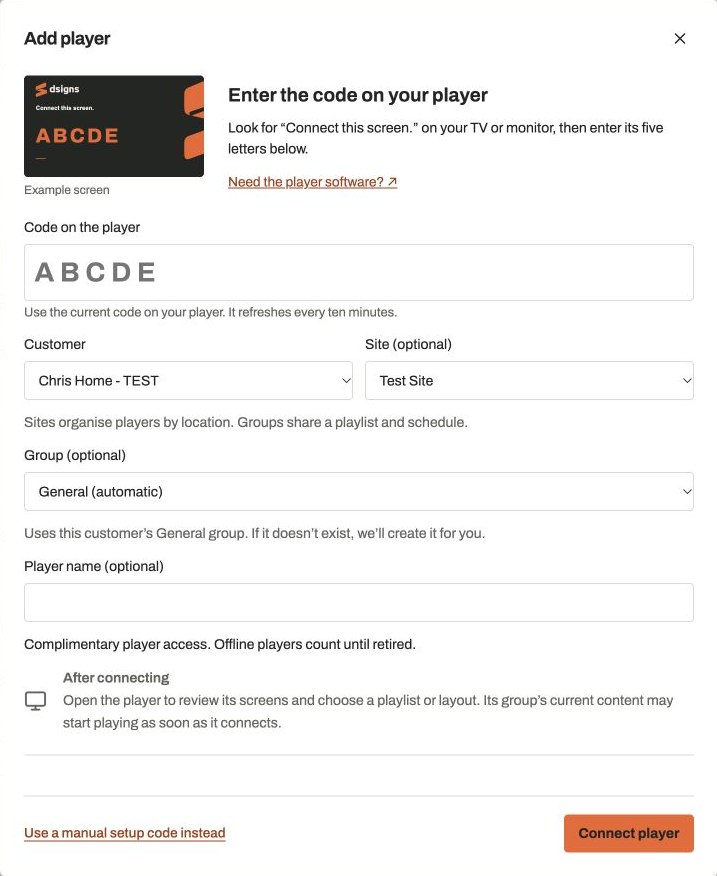
Actual app controlsAn isolated test customer is selected. Enter the five letters from your own screen. Add something to show
Open Media to upload an image or video. Then open Playlists → Add playlist, name it, choose Add media and save. Or, if the Canva pilot is enabled for your account, send your design from Canva.
Choose the screen and publish
Open your player in Players. Choose a playlist for its screen (or use its group playlist), save, then select Publish content. For a PC with multiple screens, check each screen’s assignment. Select Rename screen beside a screen’s name in Overview or Content to give that connected display its own name.
Take a look at the TV
Wait for the player to download and apply the content. Up to date means it has acknowledged the published version. Check the physical TV to confirm the picture looks right. New screens start muted; adjust Volume and publish if you need audio.